

When I first started using GitHub Copilot, consistently generating meaningful, accurate code was challenging. Limited context often led to repetitive frustrations. However, when Copilot's token limits increased, it felt transformative. More tokens meant more context, and more context meant significantly better results.
I began creating detailed prompt files, clearly outlining our project's architecture, naming conventions, testing strategies, and more. With the additional space, I could describe everything thoroughly. Initially, this approach worked well, I stored prompts locally and pasted them into Copilot when building new features.
But over time, the limitations of this manual approach became evident:
Repetitive: Frequently copying and pasting prompts became tedious, especially as my prompts scattered across different folders.
Error-prone: Outdated prompts caused Copilot to generate inaccurate suggestions, leading to avoidable mistakes.
Interruptive: Maintaining manual prompts was extra overhead, distracting me from my core development tasks.
Eventually, managing Copilot manually consumed more time than it saved.
Rethinking Prompting Strategies
While manually crafted prompts still work, they're no longer the most efficient or effective way to leverage Copilot. Today, Copilot does far more than just generate code. It can also help:
Prepare and refine tasks before coding.
Generate structured implementation plans.
Ensure code aligns consistently with your project.
Review changes and provide preliminary feedback.
Integrating Copilot throughout the entire development process can drastically improve productivity.
Project Overview: The Todo App and Vertical Feature Slicing
To illustrate this improved workflow, let's consider a simple Todo application built in .NET. Its project structure, known as Vertical Feature Slicing, organizes code by feature rather than layer:
TodoApp/
├── Application/
│   ├── TSK001Tasks/
│   │   ├── TasksFeature.cs
│   │   └── TasksFeatureSetup.cs
│   ├── USR002Users/
│   │   ├── UsersFeature.cs
│   │   └── UsersFeatureSetup.cs
├── Domain/
│   ├── Entities/
│   │   ├── TaskItem.cs
│   │   └── User.cs
├── Infrastructure/
│   └── AppDbContext.cs
├── API/
│   ├── Controllers/
│   │   ├── TasksController.cs
│   │   └── UsersController.cs
├── tests/
│   ├── ...
├── Program.cs
├── TodoApp.csproj
└── appsettings.json
Vertical Feature Slicing makes reasoning about individual features straightforward, significantly reducing context switching, perfect for AI-assisted development.
We'll explore more on the advantages of vertical slicing in a future blog.
Moving Beyond Traditional Prompting
To better understand how my workflow has evolved, let’s have a look at what one of those large manual prompts actually looked like in practice.
Here’s an example of the large, manual prompt you could paste into Copilot before starting a new task:
### Context
#### Project Structure
- The project uses a **feature slicing architecture**.
- Each feature resides in a folder in the application layer, named in the format: `[3-letter code][3-digit number][FeatureName]`.
- Each folder contains:
  - A feature file: `[FeatureName]Feature.cs`
  - A feature setup file: `[FeatureName]FeatureSetup.cs`
- Domain and UI language is in British English.

#### Database setup
- The database uses Entity Framework Core with postgress
- Related database entities are loosly coupled. Not every relation is configured in the models.
- The database uses a custom `AppDbContext` class.
- Enities are located in src/Domain/

#### Feature Setup
A standard feature setup file looks like this:
```
... example ...
```

#### Feature File
Rules:
- The requests always follow the mediator pattern from the example.
- Mediator messages always have a query and response object.
- All requests return content if successfull.
- Feature files contain only one endpoint.
- Feature files are locateded in the src/Application folder
- The exception handling should always only return badrequest and match on innerexception.
- Database operations occur in the feature file.
- The type of the mediator is called Query when it is a Get-request and Command when it is a command.

Here is an example:
```
... example ...
```

#### Testing
- Each feature has its own integration tests.
- Tests use:
- **Testcontainers** for API testing.
- **Builder pattern** for test model setup.
- **NSubstitute** for mocking.
- Setup methods from base class are executed.
- Feature Tests are located in tests/Application.Tests folder
- There is a TestDbContext for setting up entities and a separate DbContext for assertions.

A standard test class looks like this:
```
... example ...
```

### Prompt
Using the context above, perform the following task:
While this approach worked, it came with clear challenges:
Copy-pasting the same long prompt for every task is tedious.
Copilot was limited mostly to code generation, missing out on supporting other parts of the workflow.
Next, we will see how this difficult way of working changed into a simpler, more organized process that helps me work faster and write better code during the whole development.
Why Upgrade My Prompt Strategy Now?
In my previous blog post, I introduced the idea of using dedicated instruction and prompt files with Copilot. Now, it’s time to put those ideas into practice.
By using instruction files, we can:
Keep prompts consistent across the team
Avoid repeating ourselves (we’re developers, after all 😉)
Make prompts easier to update and adapt as the project evolves
This way, prompts become a natural part of how we work, not just an extra task we have to do.
Introducing Context Engineering
To improve our workflow further, we use Context Engineering. This method gives AI tools the exact information they need, organized in a clear, layered way.
Instead of giving the AI one long prompt with everything at once, we split the information into smaller parts:
Global context (general project information)
You’ll generally do not have to update this file once written, unless you introduce breaking changes.
Task-specific context (details relevant only to a particular feature or fix)
Per new feature we want to introduce, we define a task for our Copilot agent.
For the examples in this blog, we use templates from the context-engineering repository (thank you, Willem) to keep this structured and repeatable.
Using Copilot Instruction Files
We place our global project context in
.github/copilot-instructions.mdThis file is automatically included in every Copilot prompt. It holds:
Project structure and architecture
Naming conventions
Technology stack details
Coding standards and practices
Testing strategies
This acts as the baseline knowledge for Copilot, allowing it to understand your project without repeating these details in every prompt.
For task-specific context, we use
*-Task.mdThese files focus on one development task, like adding a feature or test. These task files include:
Clear feature or task descriptions
Code structure examples
Relevant documentation or snippets
Special considerations or constraints
You’re not repeating project info. just what’s new or different for this task. This lets Copilot precisely understands the intended outcome before starting work.
The Context Engineering Flow
Here’s how we apply context engineering when adding a feature:
Write the initial context: Create
.github/copilot-instructions.mdwith your project’s structure, rules, and practices.Write a task: Create a
*-Task.mddescribing the feature or improvement you want.Generate a plan: Use the
/generate-planprompt to let Copilot think and create a clear plan before writing any code.Review the plan: Check if the plan aligns with your needs.
Implement the plan: Once approved, use the
/implement-planprompt to let Copilot generate precise, context-aware code.
Why this helps
By separating what stays the same (project-wide context) from what changes (feature-specific task), you avoid repetition and reduce prompt noise. It’s faster, clearer, and leads to better outputs, especially in bigger codebases.
Practical Example: Implementing Comments Feature
Now we start on actually transforming our traditional prompt into our modern approach. We follow the flow we just described. You can follow along by checking out my repository.
1. Github/instructions/XXX.instruction.md
## Project Structure

The project uses **feature slicing architecture**:
- **Folders per feature under `src/Application`** named `[3-letter code][3-digit number][FeatureName]`.
- `[FeatureName]Feature.cs`: Defines the endpoint, logic, and database operations.
- `[FeatureName]FeatureSetup.cs`: Registers endpoints and mediator consumers for the feature.
- The **domain models** are located under `src/Domain/Entities`.
- **Infrastructure** components (e.g., `AppDbContext`, entity configurations) are located under `src/Infrastructure`.
- The API layer is under `API/Controllers` (thin controllers if used, but feature folders primarily handle endpoint logic).
- Tests are located in `tests/Application.Tests`, mirroring the structure of the `Application` layer.

## Technology stack

- **.NET (ASP.NET Core)** using minimal API endpoints inside feature files.
- **Entity Framework Core with PostgreSQL**:
    - Uses a custom `ApplicationDbContext`.
    - Entities are loosely coupled (not all foreign keys explicitly configured).
- **Testcontainers** for integration testing with containerized databases.
- **NSubstitute** for mocking during testing.
- Uses **Builder pattern** for building entities in tests.

### Mapping on the structure:

- Database operations occur **inside feature files** using `ApplicationDbContext`.
- Endpoints are registered in `FeatureSetup` files using:
- Each feature handles:
    - Registration (`FeatureSetup.cs`).
    - Request handling (`Feature.cs`) with mediator pattern:
        - `Query` for GET.
        - `Command` for POST/PUT.
    - Exception handling:
        - Always uses `try/catch` with `BadRequest` returned on `InnerException is InvalidOperationException`.

## Testing the project

- Always create **integration tests for new features**.
- Tests are located in `tests/Application.Tests/<FeatureFolder>/<FeatureName>FeatureTests.cs`.
- Follow these principles:
    - 1 test case for the **expected use** (e.g., `ShouldReturnOk_WhenValidRequest`).
    - 1 **edge case** (e.g., no comments available).
    - 1 **failure case** (e.g., invalid request returns `BadRequest`).
- Use:
    - **Testcontainers** for containerized PostgreSQL.
    - `BaseAuthApiIntegrationTest` as the base class for integration tests.
    - `TestDbContext` for inserting entities.
    - A **separate context for assertions** to avoid tracking conflicts.
    - `FluentAssertions` for clear, expressive assertions.
- Ensure **British English** is used for naming and data within tests.
As you can see, we have distilled all the top-level information that is relevant for anything I will do in this project. Whether I am adding a new feature, debugging code, or writing tests, this information will guide and shape my Copilot to do exactly what I require, so I won’t have to correct it afterward.
2. tasks/CMT003Comments/task.md
# Feature: Comments

Implement **Comments** functionality for the TodoApp, allowing users to add comments to task items for improved collaboration and context tracking, and ensure stability and correctness with integration tests.

## Examples

- A user can add a comment (text) to a specific `TaskItem`.
- Comments are tied to both the `TaskItem` and the `User` who created them.
- A GET endpoint retrieves all comments for a `TaskItem`.
- Comments are stored in the database with a timestamp and user reference.
- Tests:
    - User can successfully add a comment to a `TaskItem`.
    - Retrieving comments returns correct data.
    - Comments persist and are tied to the correct user and task.
    - Adding an empty comment fails with `BadRequest`.
    - Invalid operations return `BadRequest`.

## Documentation

- **Domain Entity**:
    - `Domain/Entities/Comment.cs`:
        - `Id`
        - `TaskItemId`
        - `UserId`
        - `Text`
        - `CreatedAt`

- **Feature Folder**:
    - `Application/CMT003Comments/`
        - `CommentsFeature.cs` (handles GET endpoint with custom Mediator, database operations).
        - `CommentsFeatureSetup.cs` (registers endpoint`).

- Uses:
    - **Entity Framework Core** with `AppDbContext`.
    - **Custom Mediator pattern** (Query + Response objects).
    - **MediatR** for consumer handling.

- Uses **British English** in domain and UI naming.
- Tests are located in:
    - `tests/Application.Tests/CMT003Comments/CommentsFeatureTests.cs`.

- Tests use:
    - `BaseAuthApiIntegrationTest` as the base class.
    - **Testcontainers** for containerized PostgreSQL.
    - **Builder pattern** for `TaskItem` and `User` creation.
    - **NSubstitute** for mocks if required.
    - `TestDbContext` for entity setup and a separate context for assertions.

## Other considerations

- Maintain **loosely coupled foreign key configurations** in EF Core.
- Exception handling:
    - Use `try/catch` in endpoints with `BadRequest` on `InnerException is InvalidOperationException`.
- Follow **feature slicing conventions**:
    - Folder name: `CMT003Comments`.
    - Files: `CommentsFeature.cs`, `CommentsFeatureSetup.cs`.
- Ensure tests:
    - Use `ClassInitialize` and `ClassCleanup` for lifecycle management.
    - Register `CommentsFeatureSetup` in `TestInitialize`
    - Follow clear `Arrange / Act / Assert` structure.
    - Use `EnsureSuccessStatusCode` and assert DTO fields.
    - Confirm database state after API calls.
- Use **British English** for all naming and test data.
By offloading this structured information into Task.md, Copilot can understand the precise goal and context, reducing misunderstandings and wasted time.
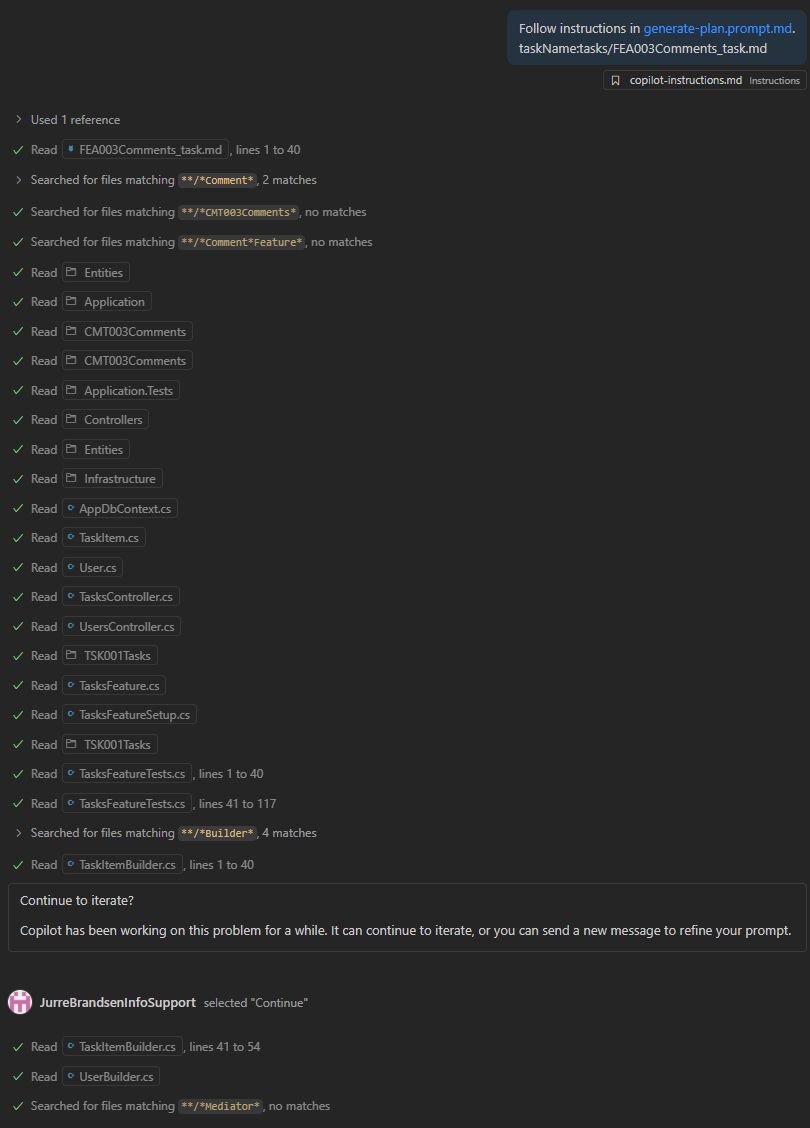
3. Letting Copilot Create the Plan
Now comes the fun part.
Using the Context Engineering Templates (or your own version), we prompt Copilot to generate a plan based on the Task.md and copilot-instructions.md.
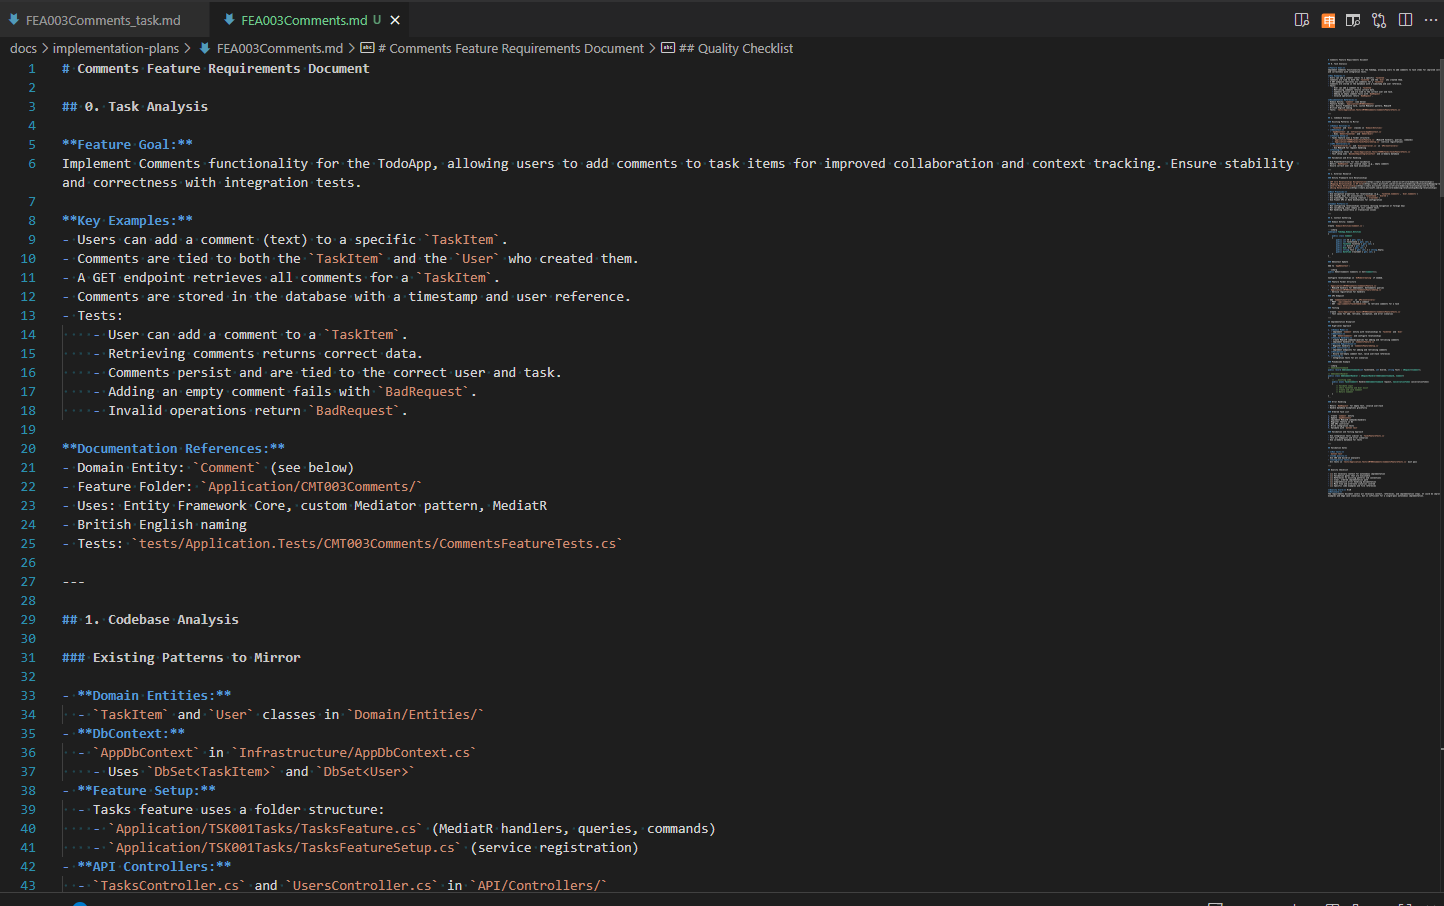
4. Reviewing the plan
Copilot analyses the task within the architecture and current codebase, and outputs a clear requirements document.
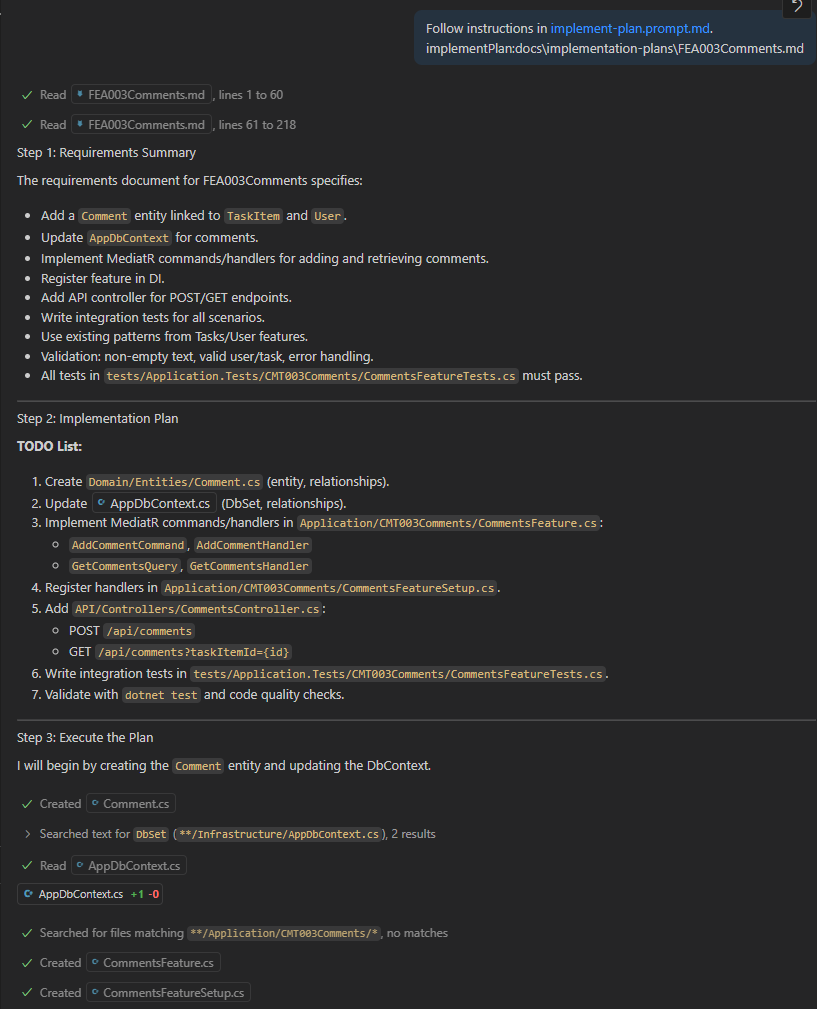
5. Executing the plan
With the requirements in hand, we prompt Copilot to execute the plan:
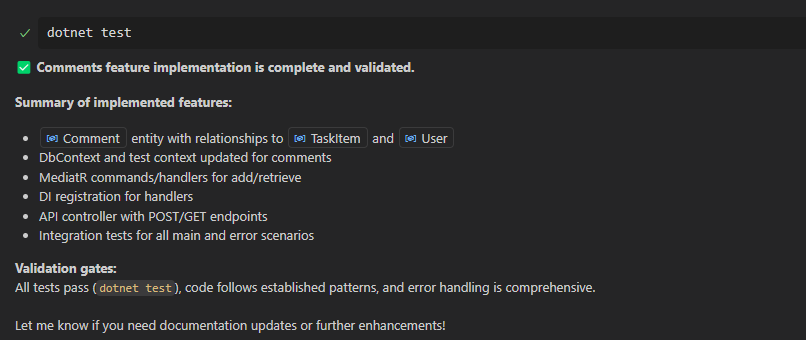
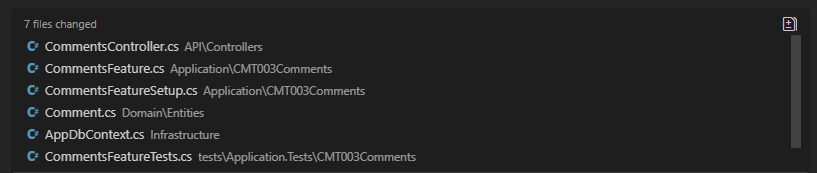
Once Copilot finishes, I review the generated code, cleaning up verbosity, adding a missing builder, and removing unused usings. This is usually all that is needed before opening a pull request for team review.
You can explore the full PR here: PR: Add Comments Feature with Context-Engineered Copilot Workflow
Final Verification and AI Self-Review
Before merging my changes, I push my code to GitHub, which has native integration with Copilot. Then, I can use Copilot to automatically review the changes in my pull request. Copilot shows what has changed, points out possible problems, and gives suggestions for improvement. This step helps me find small issues early and makes the code review process easier and faster.
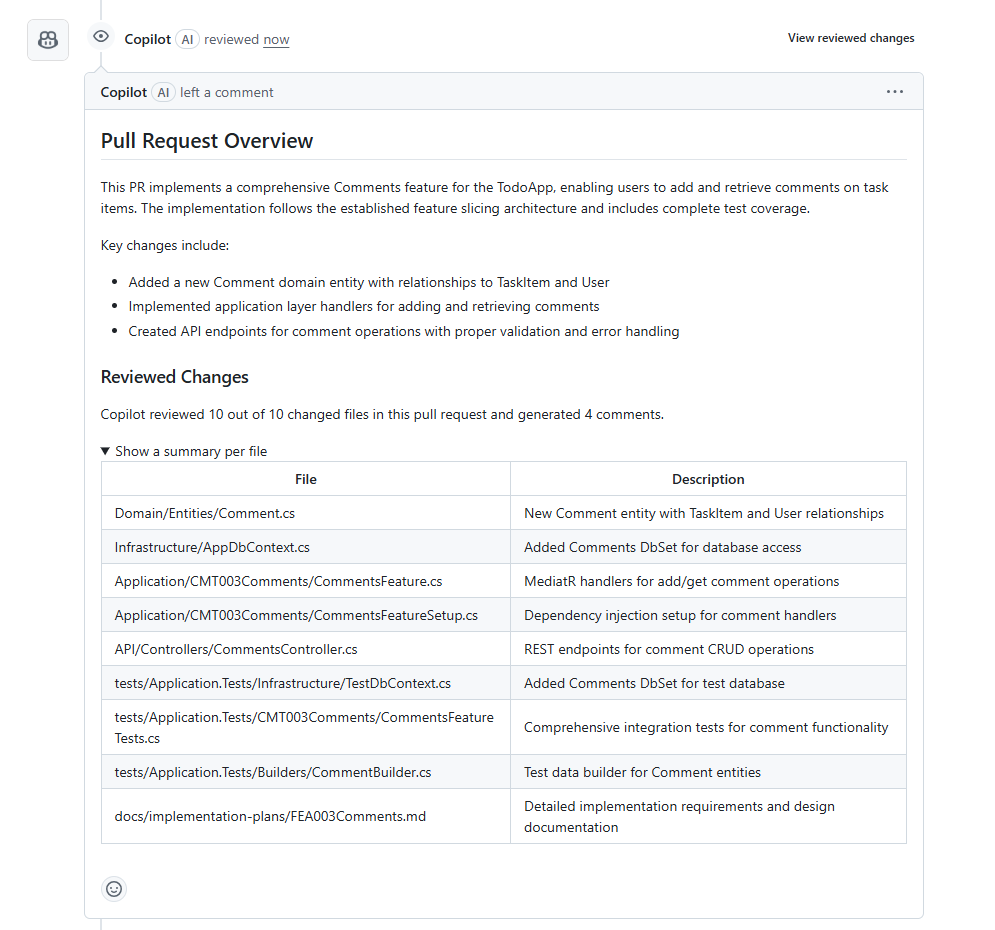
He gives me a clear overview of how he has interpreted the changes in the codebase, and then shares a few suggestions with me.
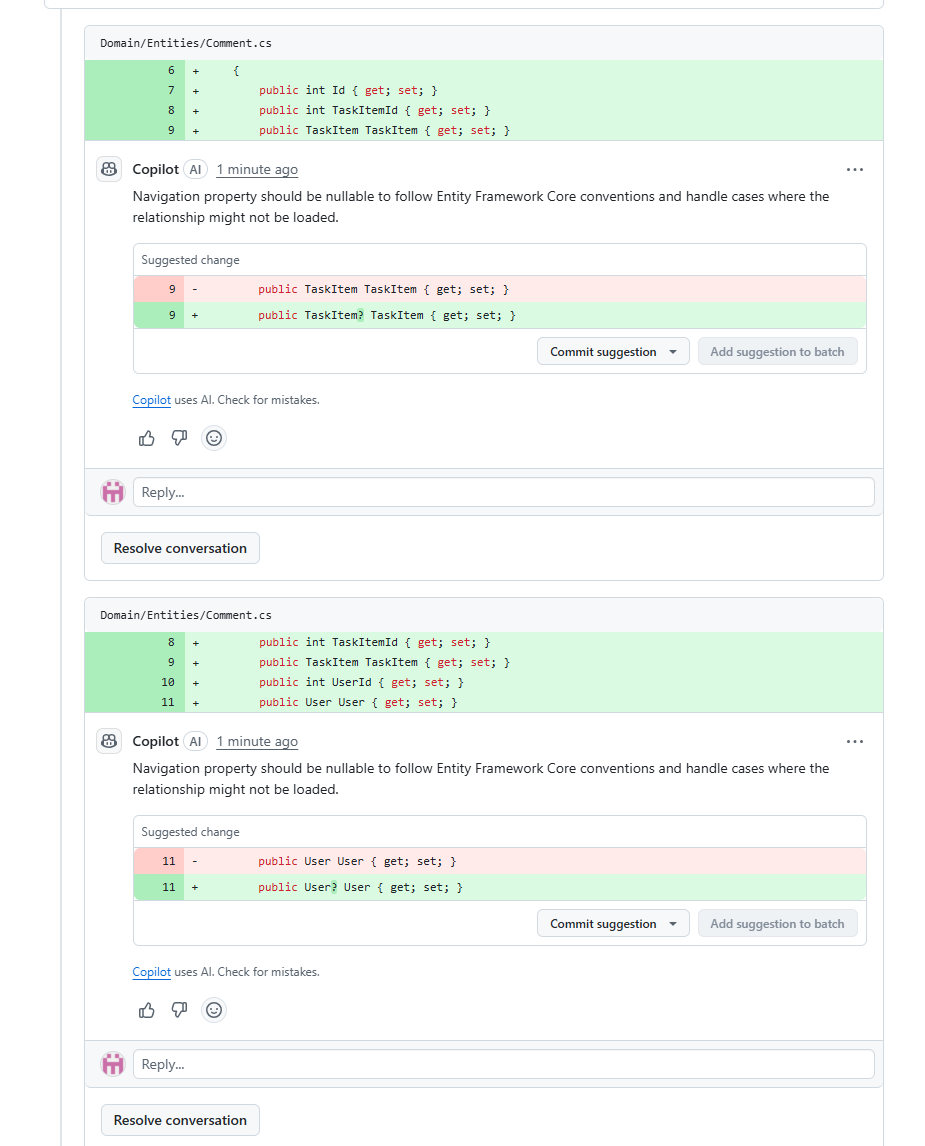
We accept relevant suggestions, finalise the PR, and send it for human review. The cycle is complete.
Closing Thoughts
Manually prompting Copilot worked at first, but it quickly became slow, messy, and hard to maintain. Copying long prompts took time and often led to mistakes.
Now, with Context Engineering, Copilot understands the full project and each task better. It helps me plan, build, and review code.
If you’re still copying prompts by hand, try using instruction files and task files. It’s faster, clearer, and gives better results.
Your Turn
Have you tried instruction files or context engineering with Copilot? What worked or didn’t work for you? Feel free to share your experience or questions in the comments, or tag me on LinkedIn.
Repo & Full Example: modern-copilot-.NET-Todo-app
Happy coding!